By Mariana Costa Oliveira • Tested in my kitchen • Updated June 2026
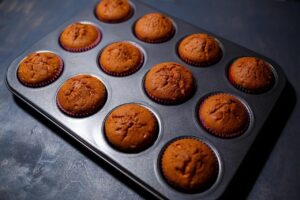
I have baked thousands of cupcakes since 2018, and I still remember the first time I pulled a tray from the oven and watched the centers collapse like tiny soufflés. Twelve perfect-looking cupcakes became twelve sad, sunken craters. I had followed the recipe exactly. I was furious. Then I started testing.
This article breaks down every reason your cupcakes sink in the middle — and more importantly, how to fix each one. Every cause listed here has been tested in my own kitchen in São Paulo, with a standard electric oven, basic grocery store ingredients, and no professional equipment.
What Happens When a Cupcake Sinks
When a cupcake sinks, the structure that formed during baking collapses before it sets permanently. The center, which is the last part to bake, fails to hold its shape. This usually happens because the batter lacks enough structure, the oven temperature is wrong, or the baking process was interrupted.
Here is the frustrating truth: one sunken batch rarely has one single cause. It is usually a combination of small errors. The good news is that each error is fixable once you understand it.
Cause 1: Overmixed Batter
Overmixing is the most common cause of sinking cupcakes, and it is the one I struggled with longest. When you beat flour with liquid for too long, gluten develops. Too much gluten creates a strong, elastic structure that rises aggressively in the oven — then collapses when the steam escapes because the walls are too tough to settle gently.
How to fix it: Mix dry and wet ingredients until just combined. The batter should look slightly lumpy. Stop the moment you no longer see dry flour streaks. I now set a timer for 60 seconds when I start folding, and I force myself to stop at the buzzer. It works.
What I learned: A few small lumps in the batter are better than a smooth batter that produces sunken cupcakes.
Cause 2: Expired or Inactive Leavening Agent
Baking powder and baking soda do not last forever. Humidity, age, and poor storage deactivate them. If your leavening is weak, the cupcakes rise just enough to look promising — then the minimal structure collapses because there was never enough gas to hold it.
How to fix it: Test your baking powder before every batch. Drop 1 teaspoon into 1/3 cup of hot water. It should bubble vigorously within 10 seconds. If it fizzes weakly or not at all, throw it out. I write the purchase date on the lid with a permanent marker and replace mine every 6 months.
What I learned: A fresh, unopened can of baking powder from a humid grocery store shelf can already be half-dead. Test it.
Cause 3: Oven Temperature Too Low
An oven that runs cold is a silent killer of cupcakes. The batter takes too long to set, so it keeps rising and rising — well past its stable limit. By the time the center finally bakes through, the outer walls have expanded too thin to support the structure. The center falls.
How to fix it: Buy an oven thermometer. Place it in the center of your oven. Preheat for at least 20 minutes. Check the reading. My oven runs 15 degrees cold. I now set it to 365°F when a recipe calls for 350°F. Problem solved.
What I learned: Oven dials lie. The only temperature that matters is the one inside the oven, not the number on the knob.
Cause 4: Opening the Oven Door Too Early
I know the temptation. At minute 12, you want to peek. You crack the door, a rush of cold air hits the cupcakes, and the fragile structure — which is still setting — collapses from the temperature shock. This is not an old wives’ tale. I tested it with two identical trays: one undisturbed, one opened at minute 10. The disturbed tray sank. The undisturbed tray did not.
How to fix it: Do not open the oven until at least 75% of the stated baking time has passed. For a 20-minute recipe, wait until minute 15. Use the oven light if you must look. If you need to rotate the tray, do it quickly and smoothly at the 75% mark.
What I learned: Patience is a measurable ingredient. Write it into your recipe notes.
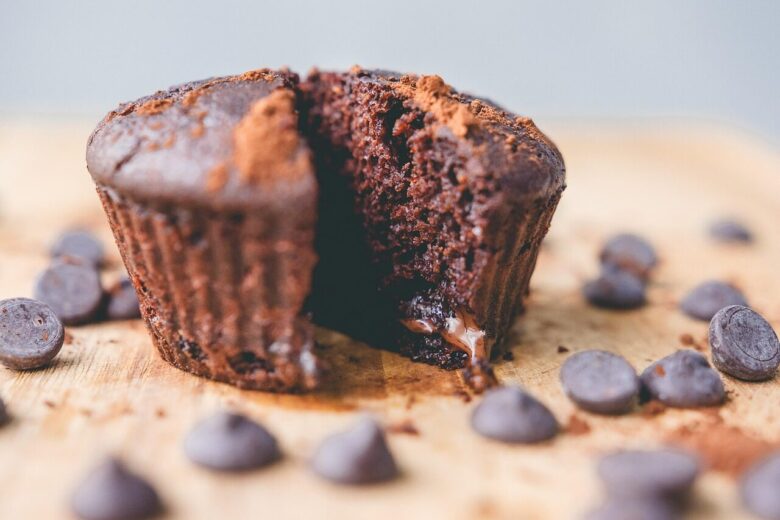
Cause 5: Underbaked Centers
This one sounds obvious, but it is trickier than it seems. The top looks golden. The edges pull away from the liner. But the center is still wet batter, held up only by the outer shell. Five minutes after cooling, the center caves in.
How to fix it: Use the toothpick test — but use it correctly. Insert a toothpick into the center of a cupcake, not the edge. It should come out with a few moist crumbs, not wet batter. If you see wet batter, bake 2 more minutes and test again. I also gently press the top center. If it springs back, it is done. If it leaves a dent, it needs more time.
What I learned: A toothpick with zero crumbs means the cupcake is overbaked. A toothpick with a few moist crumbs means it is perfectly baked. A toothpick with wet batter means it will sink. Learn the difference.
Cause 6: Incorrect Ingredient Ratios
Too much liquid, too much sugar, or too much fat weakens the batter structure. The cupcakes rise beautifully, then the excess moisture or weight causes the center to collapse as it cools. This is common when you scale a recipe up or down without adjusting the ratios.
How to fix it: Measure by weight, not volume. A cup of flour can weigh anywhere from 120g to 150g depending on how you scoop it. I use a digital scale for every batch. For standard vanilla cupcakes, my tested ratio is: 125g flour, 100g sugar, 60g butter, 120ml milk, 1 large egg, 1.5 tsp baking powder. That ratio holds.
What I learned: Volume measurements are guesses. Weight measurements are promises.
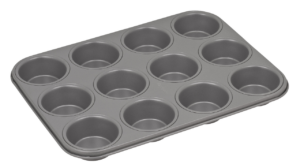
Cause 7: Overfilled Liners
When you fill liners too full, the batter has no room to rise upward. It spreads outward instead, creating a mushroom top that looks impressive in the oven. But the center is too thin and overextended to support itself. It sinks or cracks deeply.
How to fix it: Fill standard liners two-thirds full. For mini cupcakes, fill halfway. Use an ice cream scoop for consistency. I use a #16 scoop for standard liners — it gives me the same amount every time.
What I learned: Consistent filling means consistent baking. Inconsistent filling means some sink, some dome, some crack. Control the input, control the output.
Cause 8: Cold Ingredients
Butter, eggs, and milk straight from the refrigerator do not cream or emulsify properly. The batter becomes dense and uneven, baking unevenly. The center, which is already the weakest point, fails to set at the same rate as the edges.
How to fix it: Set butter and eggs on the counter 30–60 minutes before baking. Warm milk slightly to room temperature. I keep a small bowl on my counter and place eggs in it when I start gathering ingredients. By the time I preheat the oven, they are ready.
What I learned: Room temperature ingredients are not a suggestion. They are a requirement for structure.
Summary: The Sinking Cupcake Checklist
- Mix batter until just combined — 60 seconds maximum
- Test baking powder every 6 months with hot water
- Use an oven thermometer and preheat for 20 minutes
- Do not open the oven until 75% of bake time has passed
- Test center with a toothpick for moist crumbs, not wet batter
- Measure ingredients by weight, not volume
- Fill liners two-thirds full consistently
- Use room temperature butter, eggs, and milk
What to Do With Sunken Cupcakes
Do not throw them out. A sunken cupcake is still a cupcake. I cut out the center, fill it with frosting, jam, or ganache, and cover the top with a generous swirl. No one knows it sank. Some of my best-looking cupcakes started as failures.
Alternatively, crumble them into a parfait glass with whipped cream and berries. Call it a cupcake trifle. Baking is problem-solving, not perfection.
Related Reading
For more troubleshooting tips, read our guide on common cupcake mistakes — including how to fix cracked tops, dry crumbs, and gummy textures.
From My Kitchen to Yours
I still get sunken cupcakes occasionally. Last month, I forgot to test a new container of baking powder. Three trays sank. I threw out the baking powder, tested a fresh one, and baked three more trays. They were perfect.
Baking is not about never failing. It is about failing, understanding why, and baking again with better information. Every sunken cupcake taught me something. I hope this article saves you some of the lessons I learned the hard way.
If you tried a recipe and it still sank, email me at contact@cupcakeku.com. Tell me your oven type, your ingredient brands, and exactly what happened. I read every message, and I will help you troubleshoot.
Happy baking — and may your centers rise.
— Mariana Costa Oliveira, Cupcake Craft Studio, São Paulo

Mariana Costa Ota is a home baker and founder of Cupcake Craft Studio. She tests recipes, equipment, and decorating techniques in her own kitchen since 2018. No recipe makes it to the site without passing through her oven (and her honest judgment) first.