
By Mariana Costa Oliveira • Tested 29 times • Updated June 2026
My sister was diagnosed with celiac disease in 2019. She loved my cupcakes. I refused to let her eat dry, gritty, crumbly gluten-free versions that tasted like sadness. I spent two years and 29 batches developing a gluten-free cupcake recipe that she could not distinguish from my regular ones. The first 18 batches were failures. Batch #19 was acceptable. Batch #26 was good. Batch #29 is the one I share here.
Gluten-free baking is not about replacing wheat flour with a single alternative. It is about rebuilding the structure, moisture, and texture that gluten provides using a combination of ingredients and techniques. This guide covers the science, the recipe, and the mistakes I made so you can skip the failures and go straight to soft, delicious gluten-free cupcakes.
Why Gluten-Free Cupcakes Fail
Gluten is a protein network that traps air, holds moisture, and creates the elastic structure of traditional baked goods. When you remove gluten, you remove the scaffolding. Without a replacement structure, gluten-free cupcakes collapse into dense, gritty, or sandy textures.
Here are the six failures I encountered most often:
- Gritty texture: Caused by single-flour substitutes like rice flour or almond flour. These flours have different particle sizes and absorption rates than wheat flour. Without blending, the texture is sandy.
- Dense crumb: Caused by too much starch, not enough leavening, or overmixing. Without gluten to trap air, the cupcake relies entirely on chemical leavening and egg structure.
- Dryness: Caused by overbaking, not enough fat, or flours that absorb more liquid than wheat. Gluten-free batters often look wetter than wheat batters but bake drier.
- Crumbly structure: Caused by lack of binding. Without gluten, the cupcake falls apart when you bite it or remove it from the liner.
- Off-flavors: Caused by bean flours, sorghum with strong taste, or old gluten-free flours that have oxidized. Some gluten-free flours taste bitter, metallic, or musty.
- Gummy interior: Caused by too much xanthan gum, too much starch, or underbaking. The center looks wet and feels rubbery.
What I learned: There is no single gluten-free flour that works alone. The solution is a blend. And not just any blend — a blend with specific ratios of whole grain flours, starches, and binders that mimic the properties of wheat flour.
The Flour Blend: The Foundation of Success
After testing 12 different commercial blends and 7 homemade blends, I developed a blend that works consistently for cupcakes. It is a 40-40-20 ratio of whole grain flour, starch, and a secondary whole grain flour for flavor and structure.
My Tested Gluten-Free Flour Blend (makes 500g, enough for 4 batches of cupcakes)
- 200g brown rice flour (whole grain base — mild flavor, fine texture)
- 200g tapioca starch (structure and chew — mimics gluten’s elasticity)
- 100g sorghum flour (flavor and nutrition — adds depth without bitterness)
Why this blend works:
- Brown rice flour: Fine, mild, and neutral. It provides bulk without grit. I tested white rice flour — it was too starchy and created a gummy texture. Brown rice has slightly more fiber, which helps structure.
- Tapioca starch: Creates chew and elasticity. It is the closest thing to gluten’s stretch. Without it, the cupcake crumbles. With too much, it becomes gummy. 40% is the balance.
- Sorghum flour: Adds a subtle sweetness and depth. I tested millet — it was too gritty. I tested oat flour — it was good but inconsistent depending on the brand. Sorghum is reliable and widely available.
What I learned: Commercial blends vary wildly. Some are mostly starch, which creates gummy cupcakes. Some contain bean flours, which taste like beans. Some contain xanthan gum, which makes it hard to control the binder amount. Making your own blend gives you control. It takes 5 minutes. It is worth it.
Storage
Mix the blend in a large container. Store in an airtight container at room temperature for up to 3 months. After 3 months, the flours can oxidize and develop off-flavors. I mix 500g at a time and use it within 2 months.
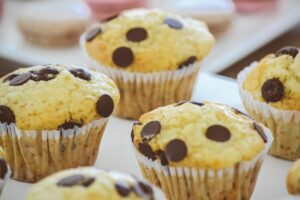
The Recipe: Soft Gluten-Free Vanilla Cupcakes
This recipe uses my flour blend. It makes 12 standard cupcakes. I have also tested it as chocolate cupcakes by replacing 25g of the flour blend with 25g cocoa powder — it works with the same liquid ratios.
Ingredients
- 150g gluten-free flour blend (from above)
- 1 teaspoon xanthan gum (only if your blend does not already contain it)
- 1½ teaspoons baking powder
- ½ teaspoon baking soda
- ¼ teaspoon fine salt
- 115g unsalted butter, room temperature
- 150g granulated sugar
- 2 large eggs, room temperature
- 2 teaspoons pure vanilla extract
- 120ml whole milk, room temperature
- 1 teaspoon apple cider vinegar
Instructions
- Preheat oven to 175°C (350°F). Verify with an oven thermometer. Gluten-free batters are more sensitive to temperature fluctuations than wheat batters. Place rack in center position.
- Prepare the pan. Line a 12-cup muffin tin with paper liners. Do not grease the pan. Gluten-free batters stick more aggressively than wheat batters. Liners are essential.
- Mix dry ingredients. In a medium bowl, whisk together the gluten-free flour blend, xanthan gum (if using), baking powder, baking soda, and salt. Whisk for 30 seconds to distribute evenly. Gluten-free flours clump more than wheat flour. Break up any lumps with your fingers or a fork.
- Mix wet ingredients. In a small bowl or measuring cup, combine milk and apple cider vinegar. Stir and let sit for 5 minutes. This creates a buttermilk substitute that adds acidity, which tenderizes the crumb and activates the baking soda. The milk will look slightly curdled. This is correct.
- Cream butter and sugar. In a large bowl, beat room-temperature butter and sugar on medium-high speed for 4 minutes. The mixture should be pale, fluffy, and nearly white. This step is even more critical for gluten-free cupcakes because there is no gluten to provide structure — the air incorporated during creaming is essential for lift.
- Add eggs and vanilla. Beat in eggs one at a time, 30 seconds each, scraping the bowl between additions. Add vanilla. Beat 10 seconds. The batter should be smooth and creamy.
- Alternate dry ingredients and milk mixture. Add one-third of the flour mixture to the butter mixture. Beat on low speed for 15 seconds. Add half the milk mixture. Beat 10 seconds. Add another third of flour. Beat 15 seconds. Add remaining milk. Beat 10 seconds. Add final third of flour. Beat 15 seconds. Stop. The batter will be thicker than wheat batter — almost like soft cookie dough. This is correct. Gluten-free batters need less liquid than wheat batters because the starches absorb differently.
- Fill liners. Use a #16 ice cream scoop or fill each liner two-thirds full. The batter will be thick and may need to be spread slightly with the back of a spoon. This recipe makes exactly 12 standard cupcakes.
- Bake. Place in the center of the oven. Bake for 20–22 minutes. Gluten-free cupcakes take slightly longer than wheat cupcakes because the starches need more time to set. At minute 20, test with a toothpick. It should come out with a few moist crumbs. If you see wet batter, bake 2 more minutes and test again. Do not overbake — gluten-free cupcakes dry faster than wheat.
- Cool in the pan. This is different from wheat cupcakes. Gluten-free cupcakes are more fragile when warm. Let them cool in the pan for 10 minutes before transferring to a wire rack. Use a thin knife to loosen any edges that stick to the pan. Then transfer to the rack and cool completely — at least 1 hour — before frosting.
Why This Recipe Works
The flour blend: Brown rice, tapioca, and sorghum create a texture that mimics all-purpose flour. The blend has protein from the whole grains, starch from the tapioca, and a fine particle size that prevents grit.
Xanthan gum: This is the binder that replaces gluten. It creates a gel-like network that holds the cupcake together. Without it, the cupcake crumbles. With too much, it becomes gummy. 1 teaspoon per 150g of flour blend is the balance I found through testing. If your commercial blend already contains xanthan gum, do not add more.
Apple cider vinegar: The acidity tenderizes the crumb and reacts with baking soda to create extra lift. Without it, gluten-free cupcakes can be dense and flat. I tested without vinegar in Batch #12. The cupcakes were edible but noticeably denser. The vinegar is not optional.
Extra leavening: Gluten-free flours are heavier than wheat flour. They need more chemical leavening to rise. This recipe uses both baking powder and baking soda — the baking soda reacts with the vinegar, and the baking powder provides additional lift. I tested with only baking powder in Batch #8. The cupcakes were flat.
Room temperature ingredients: Even more critical for gluten-free baking. Cold ingredients prevent proper creaming and emulsification, which are the only sources of structure in a gluten-free batter. I set everything out 1 hour before baking, minimum.
Common Mistakes and How I Fixed Them
Mistake 1: Gritty Texture
Cause: Single-flour substitute, coarse flour, or not enough starch in the blend.
My failure: Batch #3 used only brown rice flour. The cupcakes were gritty and sandy. My sister ate one politely and said “It is good for gluten-free.” That phrase meant failure. I wanted her to say “It is good.” Period.
Fix: Use a blend, not a single flour. The tapioca starch is essential for smoothness. If you must use a commercial blend, choose one with at least 30% starch content. Read the ingredient list. If the first ingredient is rice flour and there is no starch until the third or fourth ingredient, the blend will be gritty.
Mistake 2: Gummy Interior
Cause: Too much xanthan gum, too much tapioca starch, or underbaking.
My failure: Batch #7 used 2 teaspoons of xanthan gum because I thought more binder would help structure. The cupcakes held together but had a rubbery, almost gelatinous center. They bounced when I dropped them.
Fix: 1 teaspoon of xanthan gum per 150g of flour blend is the maximum. If your blend already contains xanthan gum, do not add any. Also, bake fully — gluten-free starches need to reach full set to avoid gumminess. Test with a toothpick for moist crumbs, not a clean toothpick. A clean toothpick means overbaked, but moist crumbs mean the starches are set without being raw.
Mistake 3: Dry, Crumbly Texture
Cause: Overbaking, not enough fat, or old flour blend.
My failure: Batch #11 was dry and crumbly because I baked for 24 minutes — 2 minutes too long. I also used a flour blend I had mixed 4 months earlier. The flours had oxidized and lost moisture-holding capacity.
Fix: Bake 20–22 minutes, test at minute 20. Store flour blends in airtight containers and use within 3 months. Also, do not reduce the butter or milk in this recipe. Gluten-free cupcakes need the fat and liquid that wheat cupcakes do, plus a little extra because the flours absorb more aggressively.
Mistake 4: Flat Tops
Cause: Weak leavening, overmixed batter, or cold ingredients.
My failure: Batch #15 had flat tops because I used baking powder that was 10 months old. It had lost potency. The cupcakes rose slightly, then collapsed. I also mixed the batter for 2 minutes after adding the flour because I wanted it smooth.
Fix: Use fresh baking powder and baking soda. Test baking powder in hot water — it should bubble vigorously. Replace every 6 months. Mix the batter minimally — 15 seconds per flour addition. The batter will be thick and slightly lumpy. That is correct. Overmixing develops no gluten (there is none), but it collapses the air bubbles you incorporated during creaming.
Mistake 5: Off-Flavors
Cause: Bean flours, old flours, or metallic-tasting starches.
My failure: Batch #4 used a commercial blend that contained garbanzo bean flour. The cupcakes tasted like hummus. My sister laughed. I threw them out. Batch #9 used a blend with old sorghum flour that tasted musty, like a damp basement.
Fix: Avoid bean flours entirely for cupcakes. They are fine for bread but ruin sweet baked goods. Buy flours from stores with high turnover. Smell the flour before using — it should smell neutral or slightly sweet, not musty, sour, or metallic. Store flours in airtight containers, not the paper bags they come in.
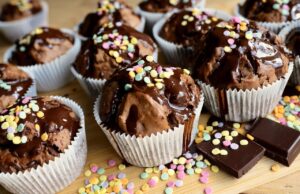
Chocolate Gluten-Free Variation
To make chocolate gluten-free cupcakes, replace 25g of the flour blend with 25g unsweetened cocoa powder. Increase the milk to 140ml (the cocoa absorbs more liquid). Add 1 teaspoon of instant coffee powder to the dry ingredients — it deepens the chocolate flavor without adding coffee taste. Everything else remains the same. Bake 20–22 minutes. Test at minute 20.
What I learned: Gluten-free chocolate cupcakes are actually easier than vanilla because the cocoa masks minor texture flaws. My sister prefers the chocolate version. I prefer the vanilla because it is a harder test of technique. Both are in my regular rotation.
How to Tell If Your Gluten-Free Cupcake Is Perfect
After 29 batches, I developed a four-point test:
Visual test: The top should be slightly domed and even. The crumb should look fine and uniform when split. No dense streaks, no pale spots, no gummy sheen.
Touch test: Gently press the top. It should spring back immediately, like a wheat cupcake. A slow spring means underbaked or gummy. No spring means overbaked and dry.
Structure test: Remove the cupcake from the liner. It should hold together when you bite it, not crumble into pieces. It should not feel rubbery or gelatinous. The texture should be tender and slightly springy.
Taste test: The flavor should be vanilla-forward, with no aftertaste of rice, beans, or starch. The sweetness should be balanced. The texture should melt in your mouth, not require chewing like bread.
What I learned: The structure test is the most important for gluten-free. A wheat cupcake can taste good even if it is slightly crumbly. A gluten-free cupcake that crumbles is a failure. The xanthan gum and flour blend must create enough structure to hold the cupcake together without being gummy.
Storage for Gluten-Free Cupcakes
Gluten-free cupcakes stale faster than wheat cupcakes because the starches retrograde (firm up) more quickly. They also absorb moisture from the air differently, becoming either soggy or dry depending on humidity.
Unfrosted: Store in an airtight container at room temperature for 12–18 hours. After that, the texture deteriorates. Freeze individually wrapped in plastic wrap for up to 1 month. Thaw at room temperature for 2 hours.
Frosted: Store in an airtight container at room temperature for 24 hours. American buttercream extends freshness by creating a moisture barrier. Refrigerate for up to 3 days, but bring to room temperature before serving — cold gluten-free cupcakes taste denser than they are.
What I learned: Gluten-free cupcakes are best eaten the day they are baked. The texture is at its peak for 6–8 hours after cooling. If I am baking for an event, I bake the morning of, not the day before. Freshness is more critical for gluten-free than for wheat.
Summary: The Gluten-Free Cupcake Rules
- Use a blend — never a single flour. Brown rice, tapioca starch, sorghum in a 40-40-20 ratio
- Use xanthan gum — 1 teaspoon per 150g of flour blend, unless your blend already contains it
- Add apple cider vinegar — it tenderizes the crumb and activates baking soda
- Use both baking powder and baking soda — gluten-free needs extra leavening
- Use room temperature ingredients — essential for creaming and emulsification
- Cream butter and sugar for a full 4 minutes — air is your only structure
- Mix minimally after adding flour — 15 seconds per addition, no more
- Bake 20–22 minutes — test at minute 20 with a toothpick for moist crumbs
- Cool in the pan for 10 minutes — gluten-free cupcakes are fragile when warm
- Store airtight and eat within 24 hours — gluten-free stales faster than wheat
- Never use bean flours for sweet cupcakes — the flavor is incompatible
Related Reading
For a complete guide to frosting options that pair with gluten-free cupcakes, read our best frosting for cupcakes guide — including buttercream, cream cheese, and ganache recipes that are naturally gluten-free and tested for stability.
Final Thoughts
My sister cried when she ate Batch #29. Not because it was bad — because it was good. Because it tasted like a real cupcake, not a gluten-free compromise. Because she could bring them to a party and no one would know. That was the moment I knew I had succeeded.
Gluten-free baking is harder than wheat baking. It requires more precision, more understanding, and more patience. But the result is worth it. A soft, fluffy gluten-free cupcake is not a miracle. It is a recipe, a technique, and a refusal to accept that “good for gluten-free” is good enough.
If you are baking for someone with celiac disease, gluten sensitivity, or a wheat allergy, this recipe is safe and delicious. But always verify that your ingredients are certified gluten-free. Cross-contamination is real. Oats, baking powder, and even vanilla extract can contain gluten depending on the brand. Read labels. Ask questions. Protect the people you are baking for.
If you try this recipe and your cupcakes are not soft and delicious, email me at contact@cupcakeku.com. Describe your flour blend, your oven, your mixing method, and the texture you got. I have made gritty, gummy, dry, and crumbly gluten-free cupcakes. I have made cupcakes that tasted like beans and cupcakes that bounced like rubber balls. I will help you find the balance.
Now mix your flour blend, set your butter on the counter, and bake a cupcake that everyone can eat — and everyone will want to.
— Mariana Costa Oliveira, Cupcake Craft Studio, São Paulo
Mariana Costa Ota is a home baker and founder of Cupcake Craft Studio. She tests recipes, equipment, and decorating techniques in her own kitchen since 2018. No recipe makes it to the site without passing through her oven (and her honest judgment) first.